Installation and getting started#
Installation#

You can install PyLumerical using pip.
First, create a virtual environment and activate it to avoid dependency conflicts and to keep your global Python environment clean.
1python -m venv .venv
2source .venv/bin/activate
1python -m venv .venv
2.venv\\Scripts\\activate.bat
1python -m venv .venv
2.venv\\Scripts\\Activate.ps1
Then, upgrade pip to the latest version, and install PyLumerical with the package name ansys-lumerical-core.
1python -m pip install -U pip
2python -m pip install ansys-lumerical-core
Tip
Using a virtual environment isn’t a requirement, but it’s a best practice for Python development. PyLumerical is compatible with various Python IDEs including VS Code, Jupyter Notebook, and Cursor. After installation, you can use your preferred editor to start using PyLumerical.
Requirements#
You must have an Ansys Lumerical GUI license along with Lumerical 2022 R1 or later on your computer to use PyLumerical. For more information, please visit the licensing page on the Ansys Optics website.
Upon importing PyLumerical, the autodiscovery logic automatically locates the Lumerical installation path and configures interop.
If autodiscovery fails, set the LUMERICAL_HOME environment variable before import and start a new Python session.
To use the Lumerical photonic inverse design module lumopt2, you must have Ansys Lumerical FDTD™ version 2026 R1.2 or later installed on your computer. The autodiscovery logic automatically locates the lumopt2 module if it is available.
Importing modules#
To use PyLumerical for simulation automation:
1import ansys.lumerical.core as lumapi
Tip
When imported this way, you can directly use your scripts written with the legacy lumapi Python module.
To use the lumopt2 inverse design module, use the code below. For further information, see the lumopt2 introduction page.
1import ansys.lumerical.core.lumopt2 as lmpt
Warning
To ensure correct functionality, only import
lumopt2throughansys.lumerical.core.Manual
sys.pathoverrides forlumopt2are unsupported. Thelumopt2module bundled with Ansys Lumerical products silently takes precedence over those added tosys.path.
My first PyLumerical project#
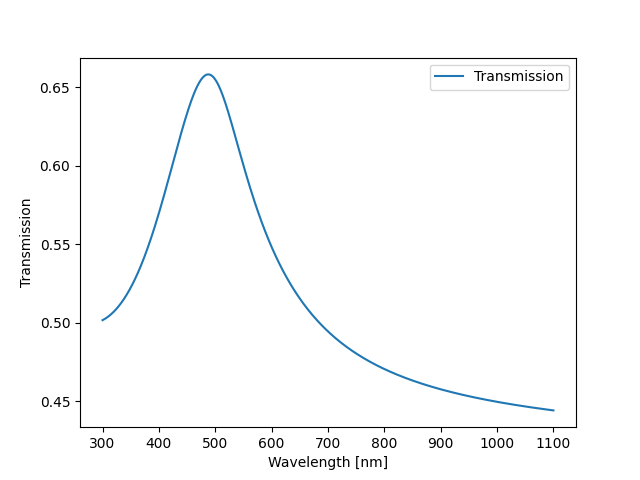
The code snippet below provides a simple project of using PyLumerical and the Python library matplotlib to visualize the transmission of a gold thin film illuminated by a plane wave.
 1import ansys.lumerical.core as lumapi
 2import numpy as np
 3import matplotlib.pyplot as plt # Ensure matplotlib is installed in your environment first
 4
 5with lumapi.FDTD() as fdtd:
 6   lambda_range = np.linspace(300e-9, 1100e-9, 500)
 7   c=2.99792458e8
 8   f_range = c/lambda_range
 9   au_index = fdtd.getfdtdindex("Au (Gold) - CRC", f_range, np.min(f_range), np.max(f_range)) # Use the getfdtdindex command to obtain the correct complex index for gold
10
11
12   stackRT_result = fdtd.stackrt(np.transpose(au_index), np.array([10e-9]), f_range) # Use the stackrt command to calculate the transmission and reflection
13# Visualize using matplotlib
14fig, ax = plt.subplots()
15ax.plot(lambda_range*1e9, stackRT_result["Ts"], label="Transmission")
16ax.set_xlabel("Wavelength [nm]")
17ax.set_ylabel("Transmission")
18ax.legend()
19plt.show()
This simulation returns the following result.
Further resources#
Information on key concepts of PyLumerical.
Reference for the PyLumerical API.
Gallery of examples using PyLumerical.
Introduction to using lumopt2 for photonic inverse design.
Recommended examples#
Recommended examples to further build your understanding of PyLumerical and its capabilities.
Run an FDTD simulation using PyLumerical and plot the electric field.
Run a waveguide simulation in MODE.
Run an an INTERCONNECT simulation for a ring resonator.